|
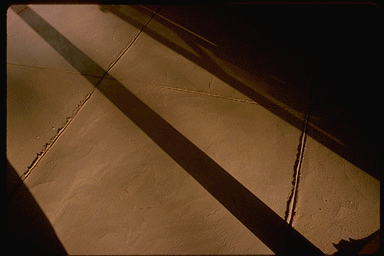
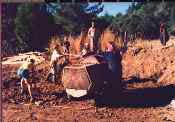
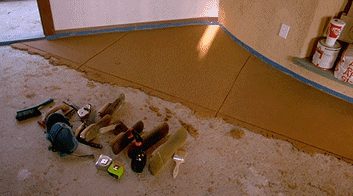
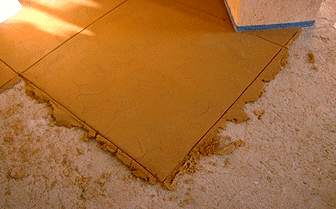
Subslab Preparation: Original plans did not call for an adobe floor. A 4" rough slab had been poured. We laid 3/4" o.d. radiant heating tubes over 2" insulation on top of the slab, and poured a very rough pea gravel mix over the tops of the tubs. Our first layer of adobe with phylum was placed on top of this. Soil: The soil was taken from nearby and contained approximately 30% clay, silt and fine sand. Preliminary tests with Portland cement mixtures showed that this soil was moderately expansive, but mixed with sand could be prevented from cracking. Base coat of stabilized adobe: We mixed adobe with 50% sand and approx. 6oz/cf of psyllium in a stucco mixer. The ingredients were mixed dry to incorporate the Psyllium un All of these mixes resulted in shrinkage cracks, which we now know could have been avoided by increasing the proportion of sand in the mix. Topping Coat: For a topping coat we used the same soil, sifted through window screen and mixed with very fine sand (120 grit). Before putting down the topping coat, we filled the cracks in the base coat with the same ingredients in a stiff mix worked into the cracks with a grout float. The surface of the adobe base was scrubbed with water and an abrasive "scrubby" to clean and soften the adobe. This process resulted in the cracks filling at least part way with water, and the cracks drying with dips about 1/8" to 3/16" below the base surface. This dipping contributed to the cracks telegraphing through to the topping coat. The filling was thoroughly dried before the topping coat was applied. Because the mud had gotten wet during storms, we could not mix it with psyllium without globs being created. We took 1/3 bucket of dry psyllium and mixed it with about 1-1/3 buckets of water to make a Jell-O-like slime. The very thoroughly mixed the water into the psyllium, and then allowed the gook to sit for at least 24 hours. This waiting period allows water to soak into all the dry psyllium. Our topping mixture was made by scooping 2 parts mud to 4 parts sand to 1 part slime, put into the bucket to mix in that order. Water was added, and we first mixed the sand and the slime together on the top before plunging the paddle (we used an "x" shaped paddle on a right-angle drill) deeper to bring up the mud. The gritty quality of the sand seems to break up the slime better---mixing immediately with the soil resulted in small globs of unmixed slime remaining in the mix. The bucket was very thoroughly mixed to destroy these globs, which show in the finished floor. Our procedure in applying the topping coat was to first scrub and wet the base coat, then trowel the adobe in place about 1/4" thick on average and flatten it with an 18" pool trowel. We applied in sections no more than an arm’s reach wide. The stabilized soil has a certain "set" as the water was pulled out of it from the dry adobe below. This "set" affects the workability of the mix. When first applied, it was fairly runny and could be easily "floated" and shaped into a level surface, but couldn’t be smoothed. As it set we did two further trowellings, first with a 10", then a very ‘soft’ 8" pool trowel. The second pass (10") left the surface a little grainy, but with a tight, uniform surface. The final pass, when the mixture was harder, made the high points slick, but left the valleys untouched. The owner preferred this, but the slab could have been left with the second pass. The finely sifted soil and fine sand made it easy to work and consolidate seams. We worked in semi-circular sections with uneven seam lines so that the joints were irregular and random, blending in with the floor. Finishes: The floor has been finished with three coats of Okan sealer, which has given it a slight gloss, particularly in high spots, which took the steel trowel in the final finish. It is too early to tell how well this will wear. The owner sealed the living room with linseed oil and prefers this finish. We attempted to give a seal of Okan, then a surface of linseed oil, but after a single sealer coat of Okan, the floor would not absorb linseed oil without becoming splotchy. Conclusions: This procedure could be replicated to produce a floor of excellent quality and consistency. It took a single person about twenty hours to do three passes on 7-800 SF of floor. It took three and a half people, plus a mixer, to pour the original 1" stabilized base. There was also several hours spent sifting the soil for the final coat. The topping coat was very thin but adhered well to the stabilized base, which was wetted and softened before application of the topping coat. Our base coat did not adhere to concrete at all well, but since it was 1" thick, it sat on top without problems. |
||||
 iformly, then water was added. We experimented with the amount of water in the mix and finally settled on a relatively wet mix, about the consistency of pancake batter. We were laying down a thickness of about one-inch. Thicker mixes, although they would shrink less, could not in practice be consolidated sufficiently for folds, joints and slip layers in the mix to melt together--the thick mix resulted in "stretch mark" cracks resulting from the unconsolidated material which had been troweled together but which ruptured because of internal layering. If the mix was too thin, it could not be trowelled without leaving gross trowel marks--and the wait for it to dry out was too great. Just the right mix could be jiggled and pressed into a monolithic whole and still could be trowelled relatively smooth before moving to the next section.